Introduction
Arc welding, also known as Shielded Metal Arc Welding (SMAW) or stick welding, is one of the most widely used welding techniques. It is known for its simplicity, affordability, and ability to work in harsh environments. Arc welding is commonly used in construction, fabrication, and repair work. This guide will walk you through the fundamentals, including the necessary equipment, safety measures, setup, techniques, and common mistakes to avoid.
What is Arc Welding?
Arc welding uses an electric current to create an intense heat arc between a consumable electrode (welding rod) and the workpiece. The electrode melts and fuses with the base metal, creating a strong bond. A flux coating on the electrode produces a protective gas shield and slag, preventing contamination from the atmosphere.
Advantages of Arc Welding:
✔️ Works well outdoors – Unlike MIG and TIG welding, arc welding doesn’t require shielding gas, making it suitable for windy or outdoor conditions.
✔️ Affordable – Equipment and consumables are budget-friendly.
✔️ Versatile – Works on a variety of metals, including steel, cast iron, and stainless steel.
✔️ Effective on thick materials – Excellent for structural welding and heavy fabrication.
Essential Equipment for Arc Welding
Before you start welding, you need the right equipment:
1. Arc Welding Machine
The welding machine provides the electrical current required to create the arc. Beginners should look for user-friendly models with easy-to-adjust settings.
✅ Key Features to Look For: • Amperage Control – Adjustable settings to match electrode size and metal thickness.
• AC/DC Output – DC welding is smoother, while AC is more affordable.
• Duty Cycle – Determines how long the machine can run before it needs to cool down.
📌 Recommended Models for Beginners: • Lincoln Electric AC225
• Forney Easy Weld 298
• Clarke Arc Welders
2. Electrodes (Welding Rods)
Choosing the right electrode is essential for a successful weld. Electrodes are coated in flux to protect the weld from contamination.
📏 Common Electrode Types: • 6013 → Best for beginners; provides smooth, easy-to-control welds.
• 7018 → Stronger welds with low hydrogen content, ideal for structural welding.
• 6011 → Excellent penetration, works well on dirty or rusty metals.
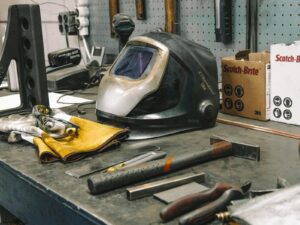
3. Welding Helmet
A welding helmet protects your eyes and face from the bright arc and UV radiation.

🔍 Features to Look For: • Auto-darkening filter – Adjusts shade levels automatically.
• Adjustable shade range – Look for #9–#13 shades.
• Comfort & Visibility – A wide viewing area improves accuracy.
📌 Popular Beginner Helmets: • Lincoln Electric Viking 3350
• YesWelder 302C
4. Welding Gloves & Protective Gear
Arc welding generates extreme heat, sparks, and UV radiation, so safety gear is crucial: • Heavy-duty welding gloves → Heat-resistant leather gloves.
• Fire-resistant jacket or sleeves → Protects from burns and sparks.
• Steel-toe boots → Shields your feet from falling metal.
• Safety glasses → Wear under your welding helmet for added eye protection.
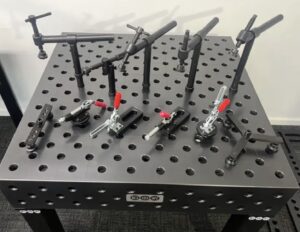
5. Work Surface & Clamps

A stable and clean work area improves welding precision: • Metal welding table → Provides a solid, conductive surface.
• C-clamps or magnetic clamps → Secure the workpiece for stability.
Safety Tips for Beginners
⚠️ Always wear protective gear to prevent burns and eye damage.
⚠️ Work in a well-ventilated area to avoid inhaling welding fumes.
⚠️ Keep a fire extinguisher nearby in case of sparks.
⚠️ Avoid welding near flammable materials.
⚠️ Inspect equipment and cables before welding.
Setting Up Your Arc Welder
- Prepare the Workpiece
• Clean the metal surface with a wire brush or grinder.
• Remove any rust, paint, or oil for better weld quality. - Select the Correct Electrode
• Match the electrode type and diameter to the metal thickness. - Adjust the Amperage
• Set the amperage according to the electrode size:
| Electrode Size | Recommended Amperage |
|---|---|
| 2.5mm (3/32″) | 40–90A |
| 3.2mm (1/8″) | 75–125A |
| 4.0mm (5/32″) | 110–165A |
- Connect Ground Clamp
• Attach the ground clamp to a clean metal surface. - Test on Scrap Metal
• Run a test bead to fine-tune settings.
Arc Welding Techniques for Beginners
1. Striking the Arc
• Tap or scratch the electrode against the metal to initiate the arc.
2. Travel Angle
• Hold the electrode at a 10-15° angle from vertical.
3. Travel Speed
• Maintain a steady pace to ensure even welds. Moving too fast results in weak penetration, while too slow causes excessive buildup.
4. Stringer Beads vs. Weaving
• Stringer beads → Best for beginners and thin materials.
• Weaving motion → Used for wider welds and thicker materials.
Common Mistakes & How to Avoid Them
❌ Welding Too Fast or Too Slow • Too fast → Weak, incomplete welds.
• Too slow → Excess heat causes warping and burn-through.
❌ Incorrect Amperage • Too high → Excessive spatter and burn-through.
• Too low → Poor penetration and weak welds.
❌ Poor Workpiece Preparation • Always clean the metal surface before welding.
❌ Improper Arc Length • Maintain an arc length of 3-5mm (1/8” to 3/16”) for stable welding.
Practice Exercises for Beginners
- Straight Line Beads • Run straight weld beads on scrap metal to develop control.
- T-Joints & Butt Welds • Practice butt welds (flat surface) and T-joints (perpendicular pieces).
- Lap Joints & Corner Welds • These are common in fabrication and essential for real projects.
Conclusion
Arc welding is an excellent choice for beginners due to its affordability, versatility, and ability to handle tough conditions. With the right equipment, safety precautions, and practice, you can quickly develop strong welding skills. Start with simple projects, refine your technique, and soon you’ll be creating strong, professional-quality welds!
