Introduction
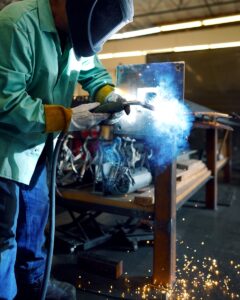
MIG (Metal Inert Gas) welding is one of the most popular and beginner-friendly welding techniques. Known for its ease of use, speed, and versatility, MIG welding is widely used in automotive repair, fabrication, and home DIY projects. This guide will walk you through the fundamentals, including the necessary equipment, safety measures, setup, techniques, and common mistakes to avoid.
What is MIG Welding?
MIG welding, also known as Gas Metal Arc Welding (GMAW), uses a continuously fed wire electrode and an inert shielding gas to create strong, clean welds. The shielding gas protects the weld pool from atmospheric contamination, ensuring a smooth and efficient welding process.

Advantages of MIG Welding:
- Easy to learn – Great for beginners compared to TIG or stick welding.
- Faster welding speed – Ideal for production work and DIY projects.
- Versatile – Can weld a variety of metals, including steel, stainless steel, and aluminum.
- Minimal slag – Produces cleaner welds with less post-weld cleanup.
Essential Equipment for MIG Welding
Before you start welding, it’s important to have the right equipment:
1. MIG Welder
The MIG welding machine is the core tool you’ll use. Beginners should look for models with user-friendly controls and built-in wire feeders for smooth wire delivery.
✅ Key Features to Look For:
• Voltage Control: Adjustable settings allow you to fine-tune power output for different metal thicknesses.
• Wire Feed Speed Adjustment: Controls how fast the welding wire is fed into the weld pool.
• Thermal Overload Protection: Prevents overheating, which can damage the welder.
• Synergic Settings (Optional): Some modern machines automatically adjust wire speed and voltage based on material thickness.
📌 Recommended Models for Beginners:
• Hobart Handler 140
• Lincoln Electric Easy MIG 140
• Forney Easy Weld 261
• A number of Clarke welding machines
2. Shielding Gas & Gas Regulator
MIG welding requires a shielding gas to protect the weld from contamination. The type of gas you use depends on the material:
• 75% Argon / 25% CO₂ → Best for steel welding; provides a clean, smooth weld with minimal spatter.
• 100% CO₂ → Cheaper alternative but produces more spatter.
• 100% Argon → Used for aluminum welding.
🔧 Gas Regulator: A gas regulator controls the gas flow from the cylinder to the welding gun. Beginners should set their flow rate between 20–25 CFH (cubic feet per hour) for optimal shielding.
3. MIG Welding Wire
Choosing the right wire is crucial for quality welds. The two main types are:
• ER70S-6 → Best for mild steel; produces strong, clean welds.
• ER4043 or ER5356 → For welding aluminum.
📏 Wire Thickness Guide:
• 0.6mm wire → Best for thin sheet metal (under 3mm).
• 0.8mm wire → Most versatile; good for general fabrication.
• 0.9mm wire → Used for thicker steel (over 6mm).
4. Welding Gun & Contact Tips
The welding gun is your main control point for feeding the wire and directing the arc. It contains:
• Trigger: Starts the arc and feeds wire.
• Nozzle: Directs shielding gas flow.
• Contact Tip: Transfers the electrical current to the wire for welding.
🛠 Tip Maintenance: Contact tips should be replaced regularly to ensure a smooth electrical connection and prevent poor welds.
5. Ground Clamp
The ground clamp connects to your workpiece, completing the electrical circuit for welding. Ensure it has:
• A strong connection for a stable arc.
• Clean contact points (remove rust, paint, or dirt before attaching).
6. Welding Helmet

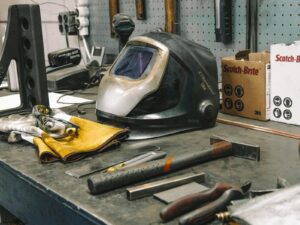
A proper auto-darkening welding helmet is essential for protecting your eyes from the bright arc and harmful UV rays.
🔍 Features to Look For:
• Auto-darkening filter (ADF): Adjusts shade levels automatically.
• Adjustable shade range: Look for #9–#13 shades for MIG welding.
• Comfort & Visibility: A wide viewing area helps you see the weld pool clearly.
📌 Popular Beginner Helmets:
• Lincoln Electric Viking 3350
• YesWelder 302C
• Antra AH6-260
7. Welding Gloves & Protective Gear
MIG welding generates high heat, sparks, and UV radiation, so proper safety gear is a must:
• Heavy-duty welding gloves → Protect your hands from burns and heat. Look for heat-resistant leather gloves.
• Welding jacket or sleeves → Prevent burns from flying sparks. Fire-resistant cotton or leather is best.
• Steel-toe boots → Protect your feet from falling metal.
• Safety glasses → Should be worn under the welding helmet for additional eye protection.
8. Work Surface & Clamps

A stable work area improves welding safety and precision:
• Metal welding table → Conducts electricity better than wood.
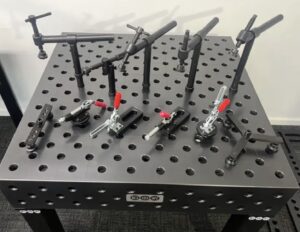
• C-clamps or magnetic clamps → Secure the workpiece for steady, precise welding..
Safety Tips for Beginners
Safety is crucial when working with high heat and electricity. Follow these guidelines:
- Always wear protective gear to prevent burns and eye damage.
- Work in a well-ventilated area to avoid inhaling welding fumes.
- Keep a fire extinguisher nearby in case of sparks.
- Avoid welding near flammable materials.
- Inspect your equipment and cables before welding.
Setting Up Your MIG Welder
1. Prepare the Workpiece
- Clean the metal surface with a wire brush or grinder.
- Remove any rust, paint, or oil for a stronger weld.
2. Set the Correct Parameters
Adjust voltage, wire speed, and gas flow based on the metal thickness:
| Metal Thickness | Voltage (V) | Wire Speed (IPM) |
|---|---|---|
| 1/16″ (1.6mm) | 16-18 | 150-250 |
| 1/8″ (3.2mm) | 18-20 | 200-300 |
| 1/4″ (6.4mm) | 20-22 | 250-350 |
3. Connect Ground Clamp
Secure the ground clamp to a clean metal surface close to the welding area.
4. Test on Scrap Metal
Before starting, run a test bead on scrap metal to fine-tune your settings.
MIG Welding Techniques for Beginners
1. Push vs. Pull Method
- Push (Forehand) – Produces a flatter, wider bead with good penetration.
- Pull (Backhand) – Gives deeper penetration but with more spatter.
2. Travel Speed & Angle
- Hold the torch at a 10-15° angle.
- Maintain a steady travel speed to ensure even welds.
- Use a consistent wire stick-out of 3/8 inch.
3. Stringer Beads vs. Weaving
- Stringer beads – Best for thinner materials.
- Weaving motion – Used for thicker metals to ensure full coverage.
Common Mistakes & How to Avoid Them
1. Welding Too Fast or Too Slow
- Too fast – Weak welds with poor penetration.
- Too slow – Excess heat buildup leading to burn-through.
2. Incorrect Voltage & Wire Speed
- Too high voltage = Excessive spatter and burn-through.
- Too low voltage = Poor penetration and weak welds.
3. Poor Workpiece Preparation
- Always clean the metal surface before welding.
4. Improper Shielding Gas Flow
- Set the gas flow to 20-25 CFH for best results.
Practice Exercises for Beginners
1. Straight Line Beads
Run straight weld beads on scrap metal to develop hand control.
2. T-Joints & Butt Welds
Practice butt welds (flat surface) and T-joints (perpendicular pieces).
3. Lap Joints & Corner Welds
These are common in metal fabrication and essential for completing your work.

Conclusion
MIG welding is one of the easiest and most effective welding methods for beginners. With the right equipment, safety precautions, and practice, you can quickly develop solid welding skills. Start with small projects, refine your technique, and soon you’ll be creating strong, professional-quality welds!
